

3.1.25. Zoiper
Overview

Prerequisites
Creating an IAX account
Extensions
Installing Zoiper on windows
Installing Zoiper2 on Linux
IAX2 Accounts Management
Adding IAX2 account
Registering IAX2 account
Deleting IAX2 account
SIP Accounts Management
Accessing Options Form
Adding SIP account
Registering SIP accounts
Deleting SIP account
Audio configuration
Accessing Options Form
Configuring Audio Settings
Protocols configuration
Accessing Options Form
IAX2 configuration
SIP configuration
RTP configuration
STUN configuration
Usage
Address Book Management
Reference
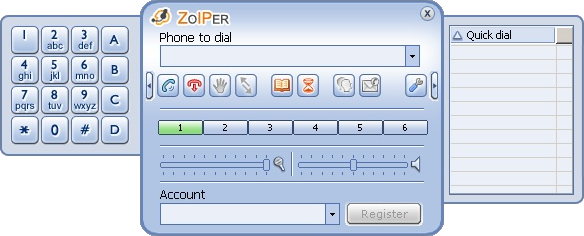
Zoiper is a IP softphone that can run on MAC, Windows and Linux.
Product Highlights:
Product Highlights:
SIP + IAX protocols
IAX2 protocols
Available codecs
STUN server per account
Changeable number of lines
IAX2 protocols
Available codecs
- GSM
- ulaw
- alaw
- speex
- ilbc
- Zoiper BIZ version supports G.729
- ulaw
- alaw
- speex
- ilbc
- Zoiper BIZ version supports G.729
STUN server per account
Changeable number of lines
three lines as Zoiper BIZ version supports up to 6 lines
Up to two accounts
Echo cancellation
Codec settings per account
Account password encryption
Address Book
Quick Dial
Outband DTMF tones sending
Up to two accounts
Echo cancellation
Codec settings per account
Account password encryption
Address Book
Quick Dial
Outband DTMF tones sending
Feature Keys:
Hold button
Transfer button
Quick Dial button
Numpad
Slide bars for speakers and microphone volume control
History button
Hold button
Transfer button
Quick Dial button
Numpad
Slide bars for speakers and microphone volume control
History button
Prerequisites
To use this softphone you need a working Asterisk PBX with registered users inv iax.conf and/or sip.conf (It depends on which protocol you would like to use) and correct extensions.
Zoiper supports SIP and IAX protocols. This means that you will be able to use SIP as well as IAX protocols.
In this tutorial you will learn how to create a SIP and an IAX account on your Asterisk server.
Zoiper supports SIP and IAX protocols. This means that you will be able to use SIP as well as IAX protocols.
In this tutorial you will learn how to create a SIP and an IAX account on your Asterisk server.
Creating an IAX account
To add IAX account follow this procedure:
1. Open terminal to your Asterisk server.
2. Open for editing your iax.conf, which is located in /etc/asterisk/ by using your favorite editor. I prefer vim.
3. On the bottom of the file add the account information:
4. When you are ready save the file and reload Asterisk IAX configuration by using the command:
Creating a SIP account1. Open terminal to your Asterisk server.
2. Open for editing your iax.conf, which is located in /etc/asterisk/ by using your favorite editor. I prefer vim.
3. On the bottom of the file add the account information:
[iax.zoiper2]
username=iax.zoiper2
secret=my_pass123
context=zoiper_tests
type=friend
host=dynamic
callerid=8765432
username=iax.zoiper2
secret=my_pass123
context=zoiper_tests
type=friend
host=dynamic
callerid=8765432
4. When you are ready save the file and reload Asterisk IAX configuration by using the command:
# asterisk -rx iax2 reload
To add SIP accounts follow this procedure:
1. Open terminal to your Asterisk server
2. Open for editing your sip.conf, which is located in /etc/asterisk/ by using your favorite editor.
3. On the bottom of the file add the account information:
4. When you are ready save the file and reload Asterisk SIP configuration by:
Mailboxes
You can add two mailboxes for the SIP and IAX2 Zoiper accounts.
To do this you will need to edit the voicemail.conf configuration file, which is located in /etc/asterisk/
Open this file for editing and add the account information on the bottom of the file:
1. Open terminal to your Asterisk server
2. Open for editing your sip.conf, which is located in /etc/asterisk/ by using your favorite editor.
3. On the bottom of the file add the account information:
[sip.zoiper2]
username=sip.zoiper2
secret=my_pass234
context=zoiper_tests
type=friend
host=dynamic
callerid=8765431
username=sip.zoiper2
secret=my_pass234
context=zoiper_tests
type=friend
host=dynamic
callerid=8765431
4. When you are ready save the file and reload Asterisk SIP configuration by:
# asterisk -rx sip reload
Mailboxes
You can add two mailboxes for the SIP and IAX2 Zoiper accounts.
To do this you will need to edit the voicemail.conf configuration file, which is located in /etc/asterisk/
Open this file for editing and add the account information on the bottom of the file:
501 => 4242,Example Mailbox,myemail@server.com
502 => 7474,Example Mailbox 2,myemail2@server.com
502 => 7474,Example Mailbox 2,myemail2@server.com
Extensions
Now, you need to add some extensions which purpose will be to dial those accounts.
I create them in a new context, called [zoiper_tests], but you can name it as you like.
Open /etc/asterisk/extensions.conf for editing and use the following syntax:
You also need to create another two extensions which purpose will be to check the voicemail accounts. Continue editing /etc/asterisk/extensions.conf and follow the syntax:
Here are the example configuration files:
extensions.conf
iax.conf
sip.conf
voicemail.conf
I create them in a new context, called [zoiper_tests], but you can name it as you like.
Open /etc/asterisk/extensions.conf for editing and use the following syntax:
[zoiper_tests]
exten => 1001,1,Dial(SIP/sip.Zoiper2,20)
exten => 1001,2,VoiceMail(501@default)
exten => 1001,n,HangUp()
exten => 1002,1,Dial(IAX2/iax.zoiper2,20)
exten => 1002,2,VoiceMail(502@default)
exten => 1002,n,HangUp()
exten => 1001,1,Dial(SIP/sip.Zoiper2,20)
exten => 1001,2,VoiceMail(501@default)
exten => 1001,n,HangUp()
exten => 1002,1,Dial(IAX2/iax.zoiper2,20)
exten => 1002,2,VoiceMail(502@default)
exten => 1002,n,HangUp()
You also need to create another two extensions which purpose will be to check the voicemail accounts. Continue editing /etc/asterisk/extensions.conf and follow the syntax:
exten => 111001,1,Answer()
exten => 111001,2,VoiceMailMain(501@default)
exten => 111001,n,HangUp()
exten => 111002,1,Answer()
exten => 111002,2,VoiceMailMain(502@default)
exten => 111002,n,HangUp()
exten => 111001,2,VoiceMailMain(501@default)
exten => 111001,n,HangUp()
exten => 111002,1,Answer()
exten => 111002,2,VoiceMailMain(502@default)
exten => 111002,n,HangUp()
Here are the example configuration files:
extensions.conf
iax.conf
sip.conf
voicemail.conf
Installing Zoiper on windows
Download Zoiper installation files from our web site and you can start the installation.
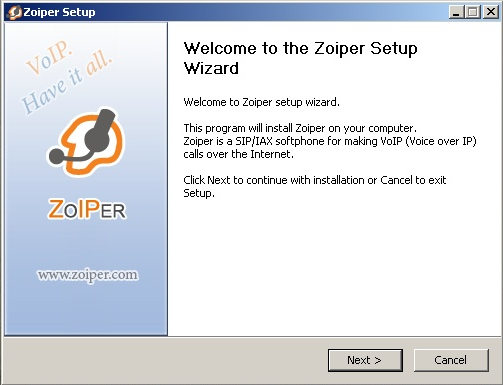
To do this just start the installation file named Zoiper_Installer - x.xx.exe. A Welcome form will appear on your screen.
To continue with the installation you should click on the Next button.
If you want to exit the setup you should click on the Cancel button.

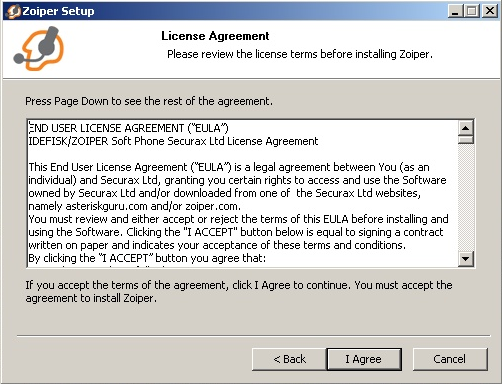
The next form is the License Agreement form. Read the End User License Agreement (a.k.a. EULA). You should carefully read the License Agreement and if you Agree with it click on the I Agree button to proceed.
If you disagree with one or more clauses of the Agreement you shouldnt install the application. In this case click on the Cancel button.

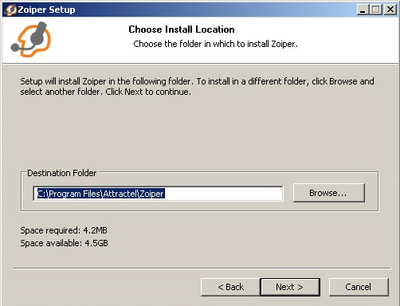
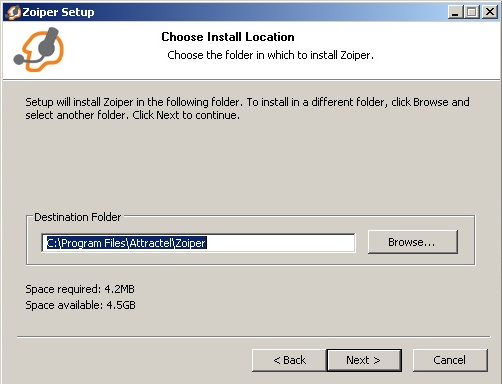
With the next form you can choose the destination folder where the Zoiper will be installed. The default folder is c: Program Files Attractel Zoiper. However you might want to install it in different location. You can type in the new path or choose it by Browse For Folder dialog. On the bottom of the form you can see if there is enough space on your hard drive to continue the installation. There are two lines showing information about space required (by Zoiper) and the available space on the current drive.
When you are ready, click on the Next button.
If you want to review the EULA you can press the Back button.
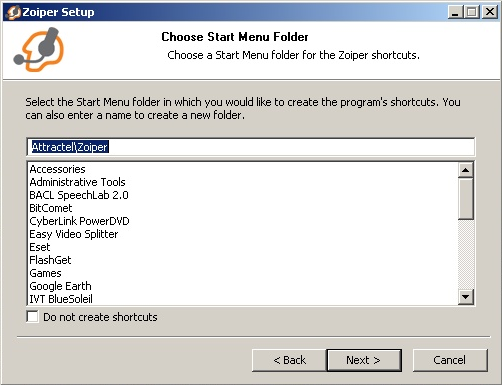
With the next form you can choose the destination folder where the Zoiper shortcuts will be placed in the Star Menu. The default folder is Attractel Zoiper. However you might want to install it in different location. You can type in the new path. If you want, you are free to disable Zoiper shortcuts by checking the Do not create shortcuts checkbox.

When you are ready click on the Next button to continue.
Use the next form to specify if the setup should create additional shortcuts. The installation can put shortcuts on the Desktop and on the Quick Launch bar. By default the setup creates those shortcuts, but you can skip this by unchecking their respective checkboxes. To start the installation process click on the Install button.
If you want to review any of the previous options click on the Back button.

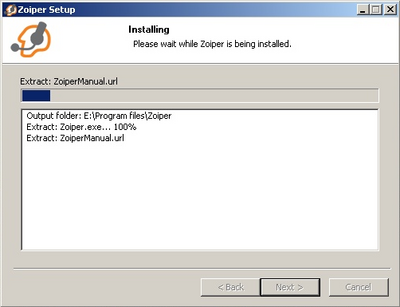
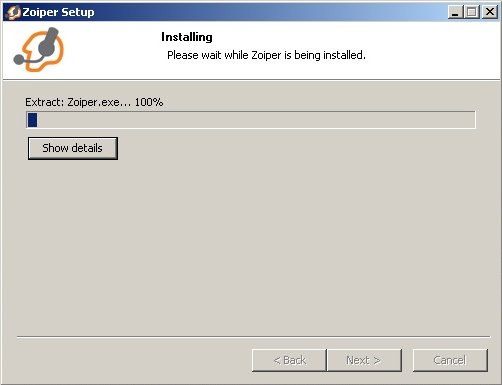
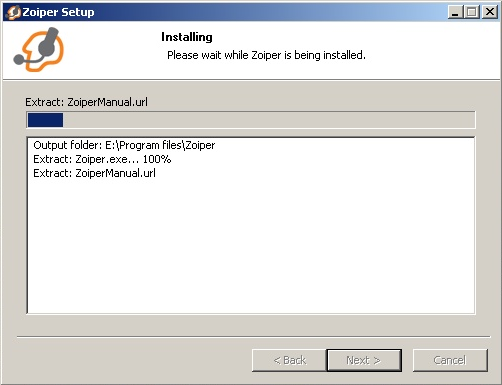
The next form shows the installation process.

You can view the details by clicking on the Show Details button.

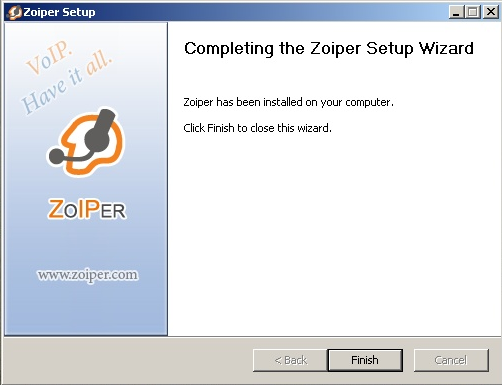
There is one final form which informs you that the installation is complete.
Click on the Finish button to close the Setup Wizard.
To do this just start the installation file named Zoiper_Installer - x.xx.exe. A Welcome form will appear on your screen.
To continue with the installation you should click on the Next button.
If you want to exit the setup you should click on the Cancel button.
The next form is the License Agreement form. Read the End User License Agreement (a.k.a. EULA). You should carefully read the License Agreement and if you Agree with it click on the I Agree button to proceed.
If you disagree with one or more clauses of the Agreement you shouldnt install the application. In this case click on the Cancel button.
With the next form you can choose the destination folder where the Zoiper will be installed. The default folder is c: Program Files Attractel Zoiper. However you might want to install it in different location. You can type in the new path or choose it by Browse For Folder dialog. On the bottom of the form you can see if there is enough space on your hard drive to continue the installation. There are two lines showing information about space required (by Zoiper) and the available space on the current drive.
When you are ready, click on the Next button.
If you want to review the EULA you can press the Back button.
With the next form you can choose the destination folder where the Zoiper shortcuts will be placed in the Star Menu. The default folder is Attractel Zoiper. However you might want to install it in different location. You can type in the new path. If you want, you are free to disable Zoiper shortcuts by checking the Do not create shortcuts checkbox.
When you are ready click on the Next button to continue.
Use the next form to specify if the setup should create additional shortcuts. The installation can put shortcuts on the Desktop and on the Quick Launch bar. By default the setup creates those shortcuts, but you can skip this by unchecking their respective checkboxes. To start the installation process click on the Install button.
If you want to review any of the previous options click on the Back button.

The next form shows the installation process.
You can view the details by clicking on the Show Details button.
There is one final form which informs you that the installation is complete.
Click on the Finish button to close the Setup Wizard.
Installing Zoiper2 on Linux
Installing Zoiper2 on your Linux box is even simpler.
1. Download the Zoiper.x.x-linux.tar.gz file from our web site .
2. Extract the archive by using ARK:
3. Move the extracted file to a desired location.
4. Run the application from the command line by
or use your mouse ;)
1. Download the Zoiper.x.x-linux.tar.gz file from our web site .
2. Extract the archive by using ARK:
# tar -xvf zoiper.x.x-linux.tar.gz
3. Move the extracted file to a desired location.
4. Run the application from the command line by
# cd path/to/zoiper
#./zoiper
#./zoiper
or use your mouse ;)
IAX2 Accounts Management
Accessing Options Form
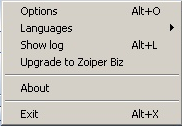
The creation of an IAX2 account goes through the configuration form of Zoiper. In order to access it you can right-click on Zoipers interface and click on the Options.

There is an Options button on the Zoipers interface. You can start configuration form from there too.

You can press "Alt+O" to access the Options screen too.
The creation of an IAX2 account goes through the configuration form of Zoiper. In order to access it you can right-click on Zoipers interface and click on the Options.
There is an Options button on the Zoipers interface. You can start configuration form from there too.
You can press "Alt+O" to access the Options screen too.
Adding IAX2 account
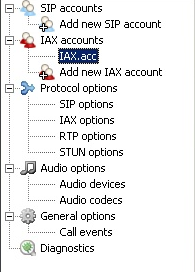
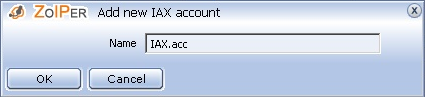
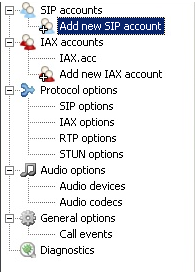
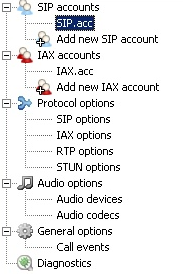
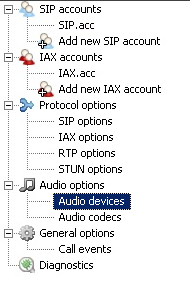
When the form starts you should click on the "Add new IAX account" label in the navigation menu to the left.

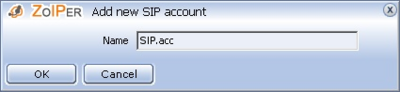
A new sub-form will prompt you for name for this account.

Type a name and click on the OK button to create the account.
The new entry will appear in the navigation menu to the left. Click on it to continue the configuration.
On the right side of the navigation menu you will be able to specify the options for the account. Youll have to enter the hostname or the IP address of the Asterisk server (or other VoIP server) that you are going to use. In our case this is 172.16.10.2 After that enter the account name and secret that we put on the IAX2 account (iax.zoiper2 & my_pass123).
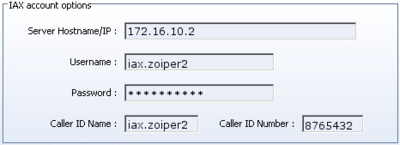
Enter a caller id and name and click on the Apply button to activate the changes.
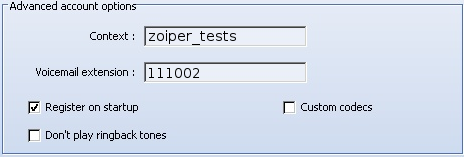
There are additional options that you might want to configure. In order to view the advanced options for the current account you should enable the checkbox with label "Show advanced options" which is located on the bottom left corner.

When you do this you will be able to set the advanced options. Set the context and the voicemail extension. You will be able to select if Zoiper should register this account upon applications start-up.

When you are ready click on the Apply button.
A new sub-form will prompt you for name for this account.
Type a name and click on the OK button to create the account.
The new entry will appear in the navigation menu to the left. Click on it to continue the configuration.
On the right side of the navigation menu you will be able to specify the options for the account. Youll have to enter the hostname or the IP address of the Asterisk server (or other VoIP server) that you are going to use. In our case this is 172.16.10.2 After that enter the account name and secret that we put on the IAX2 account (iax.zoiper2 & my_pass123).

Enter a caller id and name and click on the Apply button to activate the changes.
There are additional options that you might want to configure. In order to view the advanced options for the current account you should enable the checkbox with label "Show advanced options" which is located on the bottom left corner.
When you do this you will be able to set the advanced options. Set the context and the voicemail extension. You will be able to select if Zoiper should register this account upon applications start-up.
When you are ready click on the Apply button.
Registering IAX2 account
You should select the proper account from the drop down menu in the bottom of Zoipers interface.

When you are ready with this click on Register button.
When you are ready with this click on Register button.
Deleting IAX2 account
You should go to the Options form. From the navigation menu select the account that you want to delete.
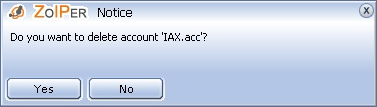
Press the delete button of your keyboard and confirm the deletion on the Confirmation dialog.
Press the delete button of your keyboard and confirm the deletion on the Confirmation dialog.
SIP Accounts Management
Accessing Options Form
The creation of a SIP account goes through the configuration form of Zoiper. In order to access it you can right-click on Zoipers interface and click on the Options.

There is an Options button on the Zoipers interface. You can start configuration form from there too.

You can press "Alt+O" to access the Options screen too.
There is an Options button on the Zoipers interface. You can start configuration form from there too.
You can press "Alt+O" to access the Options screen too.
Adding SIP account
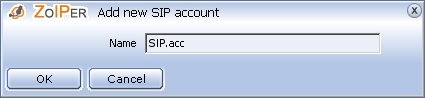
You should go to the Options form. When the form starts you should click on the "Add new SIP account" label in the navigation menu to the left.
A new sub-form will prompt you for name for this account.
Type a name and click on the "OK" button to create the account.
The new entry will appear in the navigation menu to the left.
Click on it to continue the configuration.
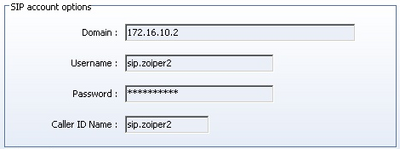
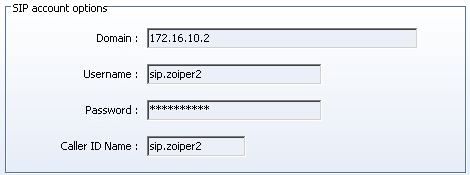
On the right side of the navigation menu you will be able to specify the options for the account. Youll have to enter the hostname or the IP address of the Asterisk server (or other VoIP server) that you are going to use. In our case this is 172.16.20.2 After that enter the account name and secret that we put on the SIP account (sip.zoiper2 & my_pass234). Enter a caller id and name and click on the Apply button to activate the changes.
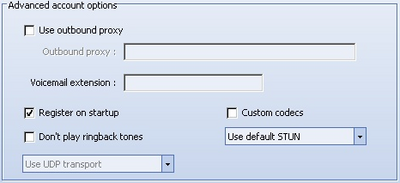
There are additional options that you might want to configure. In order to view the advanced options for the current account you should enable the checkbox with label "Show advanced options" which is located on the bottom left corner.

When you do this you will be able to set the advanced options. Set outbound proxy, if necessary, or the voicemail extension. You will be able to select if Zoiper should register this account upon applications start-up. Check if you need to use a STUN server.
When you are ready click on the Apply button.
A new sub-form will prompt you for name for this account.
Type a name and click on the "OK" button to create the account.
The new entry will appear in the navigation menu to the left.
Click on it to continue the configuration.
On the right side of the navigation menu you will be able to specify the options for the account. Youll have to enter the hostname or the IP address of the Asterisk server (or other VoIP server) that you are going to use. In our case this is 172.16.20.2 After that enter the account name and secret that we put on the SIP account (sip.zoiper2 & my_pass234). Enter a caller id and name and click on the Apply button to activate the changes.
There are additional options that you might want to configure. In order to view the advanced options for the current account you should enable the checkbox with label "Show advanced options" which is located on the bottom left corner.
When you do this you will be able to set the advanced options. Set outbound proxy, if necessary, or the voicemail extension. You will be able to select if Zoiper should register this account upon applications start-up. Check if you need to use a STUN server.

When you are ready click on the Apply button.
Registering SIP accounts
You should select the proper account from the drop down menu in the bottom of Zoipers interface. When you are ready with this click on Register button.

Deleting SIP account
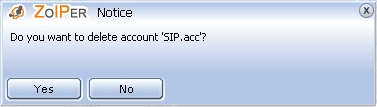
You should go to the Options form. From the navigation menu select the account that you want to delete.
Press the delete button of your keyboard and confirm the deletion on the Confirmation dialog.
Press the delete button of your keyboard and confirm the deletion on the Confirmation dialog.
Audio configuration
Before making any calls it is recommended to reconfigure your audio options. To do this you should enter the configuration form.
Accessing Options Form
In order to access the Options Form you can right-click on Zoipers interface and click on the Options.
There is an Options button on the Zoipers interface. You can start configuration form from there too.

You can press " Alt+O" to access the Options screen too.
There is an Options button on the Zoipers interface. You can start configuration form from there too.
You can press " Alt+O" to access the Options screen too.
Configuring Audio Settings
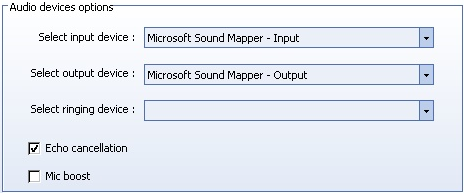
Select Audio Devices label from the navigation menu located in the left.
Select the devices that you are going to use for audio input and output. On my computer Im using Microsoft Sound Mapper, so Ill select it. When you are ready with this choose if you want to enable the Echo Cancellation...
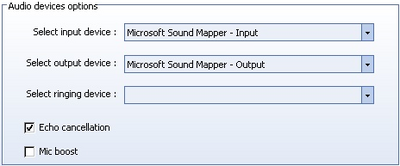
... and click on Apply button.
Select the devices that you are going to use for audio input and output. On my computer Im using Microsoft Sound Mapper, so Ill select it. When you are ready with this choose if you want to enable the Echo Cancellation...
... and click on Apply button.
Protocols configuration
Concerning the protocols there are some simple configuration options. Most of them are about the communication port on which the protocol works. To reconfigure these you should enter the configuration form and enable the advanced options.
Accessing Options Form
Right-click on Zoipers interface and click on the Options.

There is an Options button on the Zoipers interface. You can start configuration form from there too.

You can press "AltO" to access the Options screen too.
There is an Options button on the Zoipers interface. You can start configuration form from there too.
You can press "AltO" to access the Options screen too.
IAX2 configuration
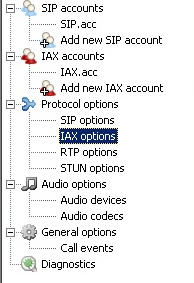
Click on the "IAX options" label in the navigation menu.
Now you will be able to specify different IAX2 port.

Now you will be able to specify different IAX2 port.

SIP configuration
Click on the "SIP options" label in the navigation menu.
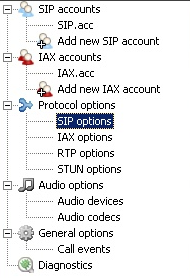
Now you will be able to specify different SIP port.

Now you will be able to specify different SIP port.

RTP configuration
Click on the "RTP options" label in the navigation menu.
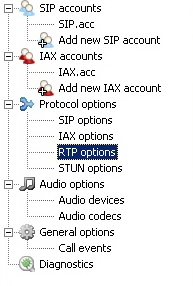
Now you will be able to specify different RTP port.

There are also "Advanced RTP options"
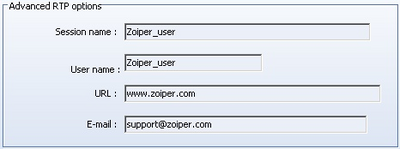
Now you will be able to specify different RTP port.

There are also "Advanced RTP options"

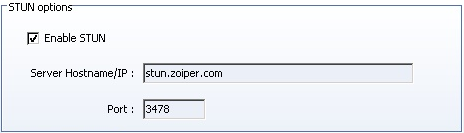
STUN configuration
Click on the "STUN options" label in the navigation menu.
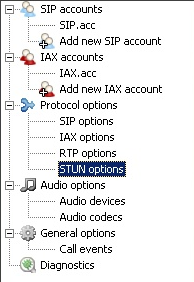
If your computer is behind NAT it is recommended to use a STUN server. To do these first enable STUN support. Then you should specify the hostname or the IP address of the STUN server. You may change the default STUN port too.
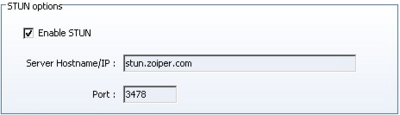
You can specify custom refresh period for your STUN server. To do this edit this setting.

If your computer is behind NAT it is recommended to use a STUN server. To do these first enable STUN support. Then you should specify the hostname or the IP address of the STUN server. You may change the default STUN port too.
You can specify custom refresh period for your STUN server. To do this edit this setting.

Usage
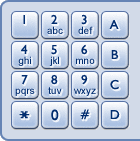
In order to dial a number from your Zoiper you just have to type it in and press enter or the Dial button.

The other way of dialing is through the numpad. After dialing the number press enter or the Dial button.
In order to hang-up a call you can simply click on the Hang-up button.

In order to hold the call for a moment (the other party wont hear you) just push the Hold button.

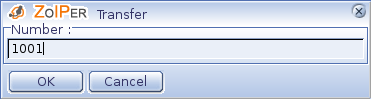
If you are already in a call you can transfer the call to another number. To do this you should press the Transfer button.

When you do this the Transfer dialog will prompt you for the extension to which you want to transfer your call. When ready with typing, press OK to finish the transaction.
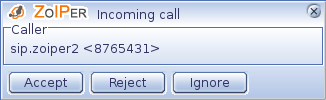
When someone ring on your extension an incoming call dialog will appear on your screen. You can Accept, Ignore or Reject the call by pressing the appropriate button.
The other way of dialing is through the numpad. After dialing the number press enter or the Dial button.
In order to hang-up a call you can simply click on the Hang-up button.
In order to hold the call for a moment (the other party wont hear you) just push the Hold button.
If you are already in a call you can transfer the call to another number. To do this you should press the Transfer button.
When you do this the Transfer dialog will prompt you for the extension to which you want to transfer your call. When ready with typing, press OK to finish the transaction.
When someone ring on your extension an incoming call dialog will appear on your screen. You can Accept, Ignore or Reject the call by pressing the appropriate button.
Address Book Management
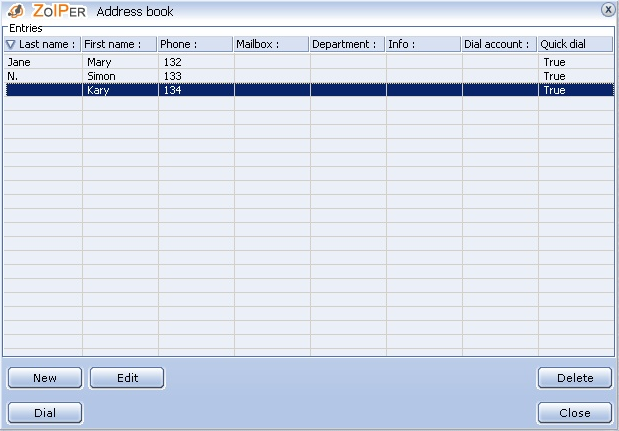
It is useful to use the integrated Address Book. It supports quick dial and more. To start the address book click its button on the Zoipers interface.

Once it starts you will see the current entries in the book.

If you want to add new entry just click on New button and the New Entry form will be started. Just fill the data you want and click on OK. You can choose if this entry should be visible in the quick dial list.

After you add the new entry you will be able to edit it. To do this you should select the entry and click on the Edit button.

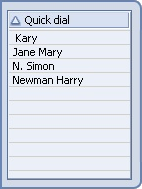
You can always use the quick dial function of Zoiper. There you will see all entries that are in your Address Book and enabled into the quick dial.
Once it starts you will see the current entries in the book.
If you want to add new entry just click on New button and the New Entry form will be started. Just fill the data you want and click on OK. You can choose if this entry should be visible in the quick dial list.
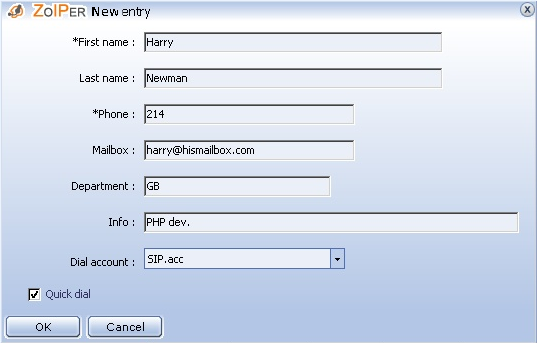
After you add the new entry you will be able to edit it. To do this you should select the entry and click on the Edit button.
You can always use the quick dial function of Zoiper. There you will see all entries that are in your Address Book and enabled into the quick dial.
Reference
| Add Comment |
Latest Headlines:
-
T.38 faxing with Zoiper 2.15 is now easier than ever
section: voip software
-
Asterisk 1.4.21 Released
section: Asterisk
-
Asterisk 1.4.20 Released
section: Asterisk
-
Asterisk 1.4.20-rc2 Released
section: Asterisk
-
Asterisk 1.4.20-rc1 Now Available
section: Asterisk
- News Archives (older news)
Latest Tutorials:
-
Sending Fax from Zoiper to Zoiper using T.38
added 08/Dec/2008 18:16
-
VMAuthenticate (dialplan application)
added 01/Mar/2008 15:57
-
Siptronic ST-530
added 06/Nov/2007 17:57
-
Siemens C455 IP hardphone
added 05/Nov/2007 10:24
-
Zoiper
added 22/Oct/2007 17:53
Latest Comments:
-
https://www.imdb.com/list/ls540847699/
...
tutorial: Installation on Slackware
-
https://www.imdb.com/list/ls540841042/
...
tutorial: Installation on Slackware
-
https://m.facebook.com/media/set/?set=a....
tutorial: Installation on Slackware
-
https://m.facebook.com/media/set/?set=a....
tutorial: Installation on Slackware
-
https://bento.me/films-voir-le-royaume-d...
tutorial: Request to schedule in the past?!?!